The Secrets of Success When Working with Rolled Fondant
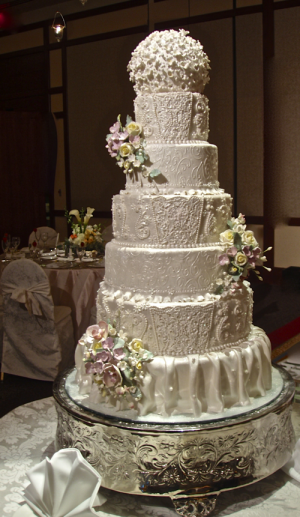
When rolling out fondant do so on a silicone mat. Lightly grease the mat and roll the fondant to 1/8” 3 cm. it is not recommended to use cornstarch/cornflower or powdered sugar/icing sugar. This makes the fondant too dry causing rips and tears or an elephant skin appearance.
1. To prepare cakes for fondant, ice with buttercream. Cover the cake with the full coating of buttercream (1.4”) not a crumb coat. Buttercream should be smooth and the cake should not be visible.
2. Place the cake in the refrigerator to cool until the buttercream is firm.
3. Knead the fondant well being careful not to incorporate air bubbles (lightly grease your hands with shortening). When the fondant is soft, pliable with a little warmth to it, place in a plastic bag and keep the bag sealed until ready to use.
4. Using the Ateco 19” white nylon rolling pin, gently roll out the fondant onto the Ateco fondant silicone mat until it is level. Working from the middle outwards, gently push and pull, sliding the rolling pin gently but firmly over the surface of the fondant, gently stretching it from the center to the edges. Do not press too hard creating indentations or the rolling pin will not slide easily.
5. Continue stretching the fondant by sliding and rolling up-and-down and across until the fondant is approximately 1/8 of an inch thin.
6. If you don't have the correct shape add fondant to the edges to patch. Because you have not used cornstarch or powdered sugar, the fondant will join easily without leaving a seam.
7. Remove the cake from the refrigerator, place on the table and lift the silicone mat with the fondant attached. The fondant will not slide off the mat. With fondant slide down, flip the fondant and the mat over the cake. Carefully peel the mat from the fondant leaving the fondant draped over the cake. The mat will peel away from the fondant easily without tearing.
8. Use a thin, soft, dry sponge to mold the fondant to the shape of the cake, working around the cake smoothing it down inch by inch. Gently stretch the fondant open when molding it to the cake to prevent creases. Trim the excess from the cake. The excess fondant has not been contaminated with cornstarch or icing sugar, therefore, can be replaced in the plastic bag and bucket.
9. Put the cake back into the fridge until you are ready to decorate it. You will notice that a small amount of condensation may form on the cake. Do not be concerned, as the condensation will give fondant a nice sheen and will keep it soft and palatable.
10. Most people do not like to eat thick fondant. Customer satisfaction is of utmost important and if the fondant is being peeled off the cake and left on the plate, it is an indication that the fondant is too thick and heavy and does not want to be eaten.
11. The SAI method of covering the cake with thin fondant will please your customers as they will not have to chew their frosting, it will also save you money!
Covering cake dummy with fondant:
1. Attach dummy to cake board.
2. Roll out the fondant slightly thicker then you would if you were covering a cake.
3. Spread a thin layer of shortening over the surface of the fondant.
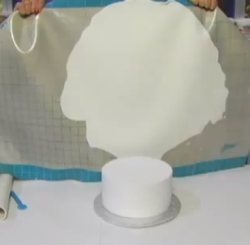
4. Pick up the mat, with the fondant attached and flip over the cake dummy. Applying fondant to cake
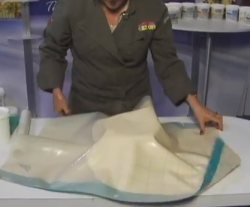
5. Gently peel the mat away from the fondant. Fondant mat on cake
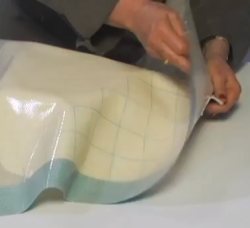
6. The shortening on the fondant will be underneath and act as the glue to adhere the fondant to the Styrofoam dummy.
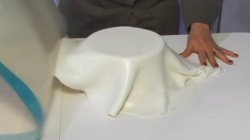
7. Mold the fondant to the shape of the dummy using a soft dry sponge.
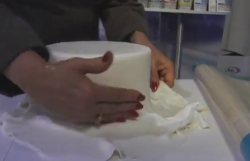
8. Trim off excess.
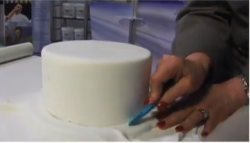
9. Knead the remaining fondant and store in a sealed container.
10. The quicker one works with fondant the easier it becomes to handle!
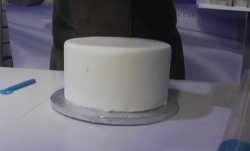
11. After sponging the fondant to mold to the cake dummy, use two cake smoothers to finish off the sides.
Borders with cutters:
1. Mix 50% gum paste with 50% fondant. This gives an excellent consistency for decorating the sides and top of the cake.
2. When making borders remember to keep them thin and delicate. It is not attractive or palatable when the decorative work on a cake is thick and heavy.
3. After rolling your 50-50 thinly, release the paste from the board. Lightly dust with cornstarch, and then quickly wipe off any residual cornstarch so that the paste releases without stretching.
4. Carefully attach to the cake using a small amount of water placed on the border not the cake.
Posted on 12/05/2017 at 12:00 AM
